
Some branded headsets come with buttons that can be integrated with 3CX. To integrate your headset with 3CX follow these steps:
- Open the 3CX application.
- Open 3CX settings.
- Select the Audio/Video settings.
- Under headset select your brand of headset.
Currently, the only headsets that offer integration with 3cx are:
- Sennheiser
- Plantronics
- Jabra
- Yealink
For a more detailed set of instructions with step-by-step instructions and screenshots please continue reading below.
How to Integrate Your Headset With 3CX
Total Time: 1 minute
-
Open 3CX Application

Open the 3CX application. For this example, I am using the Windows 3CX application.
-
Open 3CX Windows Application

Select the three dots (1) in the left-hand side margin of the 3CX Windows application, then select Settings (2) for the list.
-
Open 3CX Audio/Video Settings
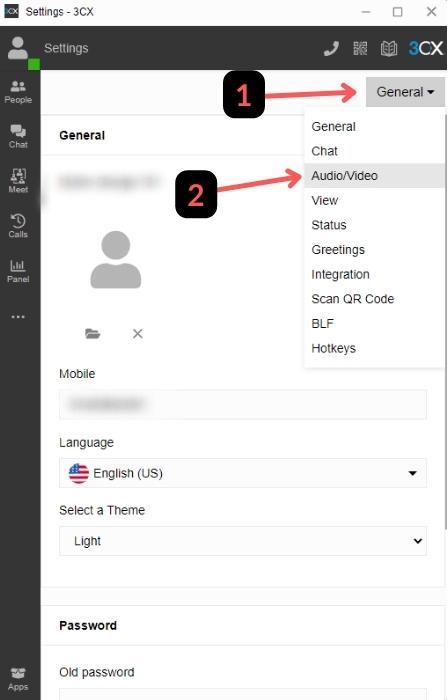
Select the dropdown list (1) in the top right of the application. From the dropdown list, select Audio/Video (2).
-
Select Headset Integration
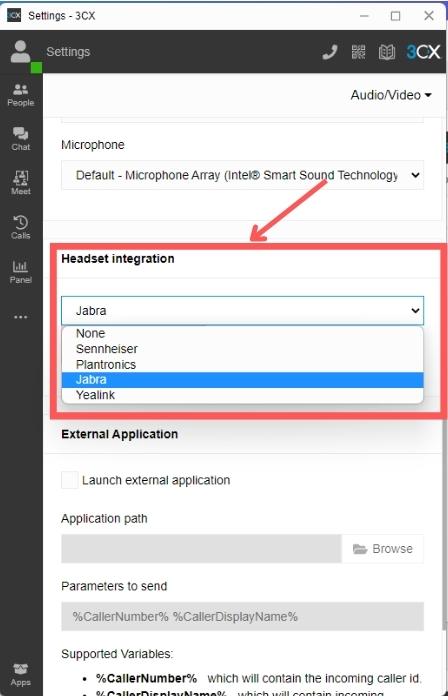
Scroll down the Audio/Video settings until you find the Headset Integration section. Select your brand of headset device from the dropdown list.
Please note: when you first select your brand of headset, 3CX may show an error, but just be patient and wait around 10 to 30 seconds, it needs this time to work itself out and provided you have a compatible brand of headset, then it should work fine.
Tools:
- 3CX application
Final Thoughts
If you have any questions relating to 3CX’s settings, please feel free to contact us or comment below.