To change the color of a horizontal line, do the following steps:
- Select the line just above the horizontal line.
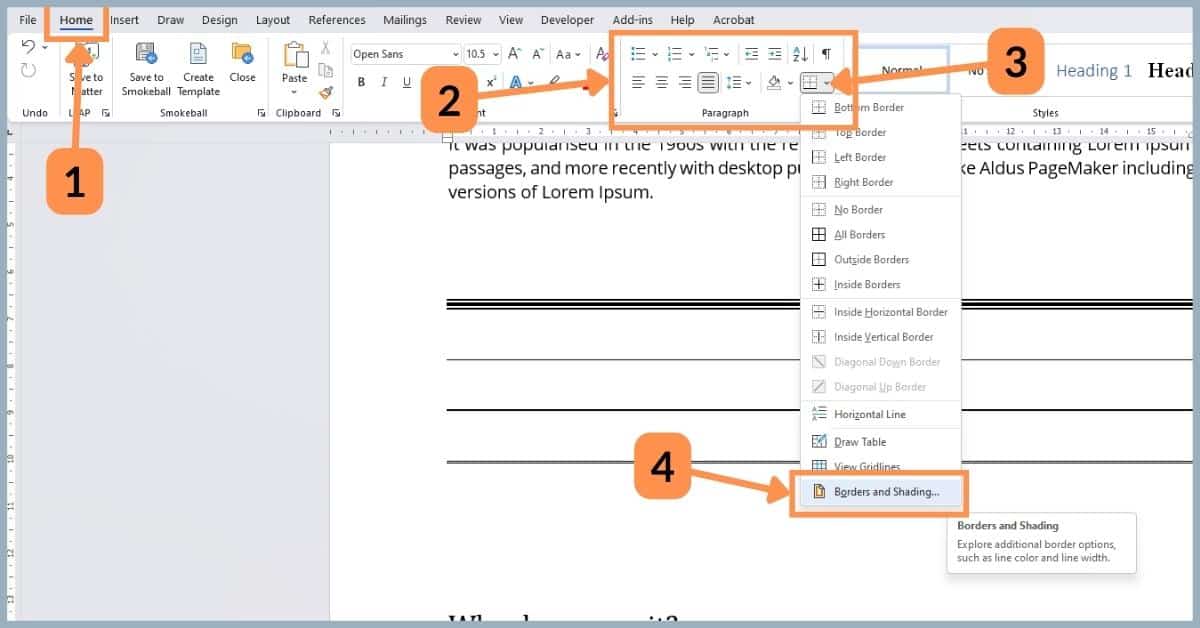
- In the Home tab go to the Paragraph section, select the arrow next to the Borders button and select Borders and Shading… (Home tab >> Paragraph section >> Boarders >> Borders and Shading…)
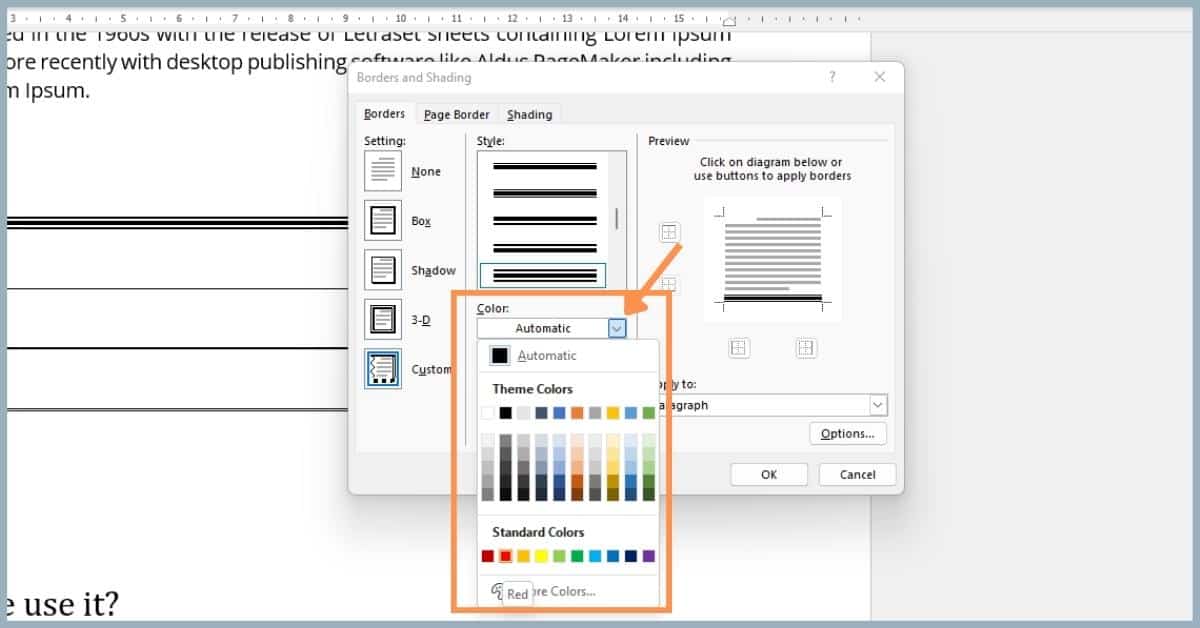
- Set the color you want in the Border and Shading dialogue box.
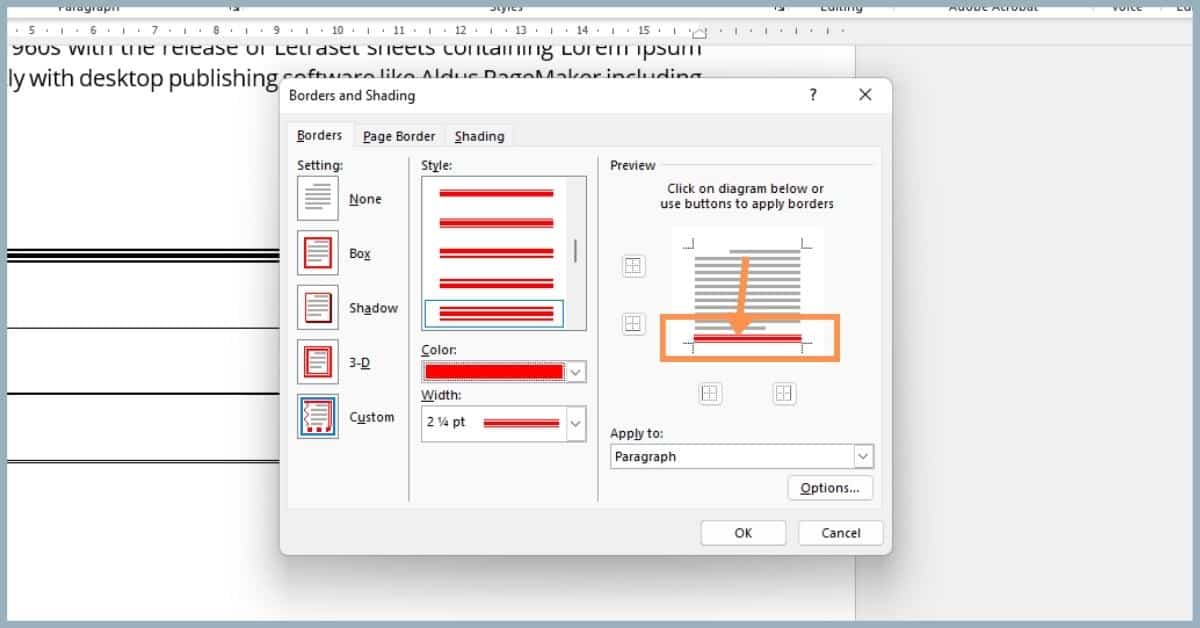
- Then on the right-hand side of the dialogue box, select the line you can see being visualised (usually it will be the bottom line) to apply the color change.
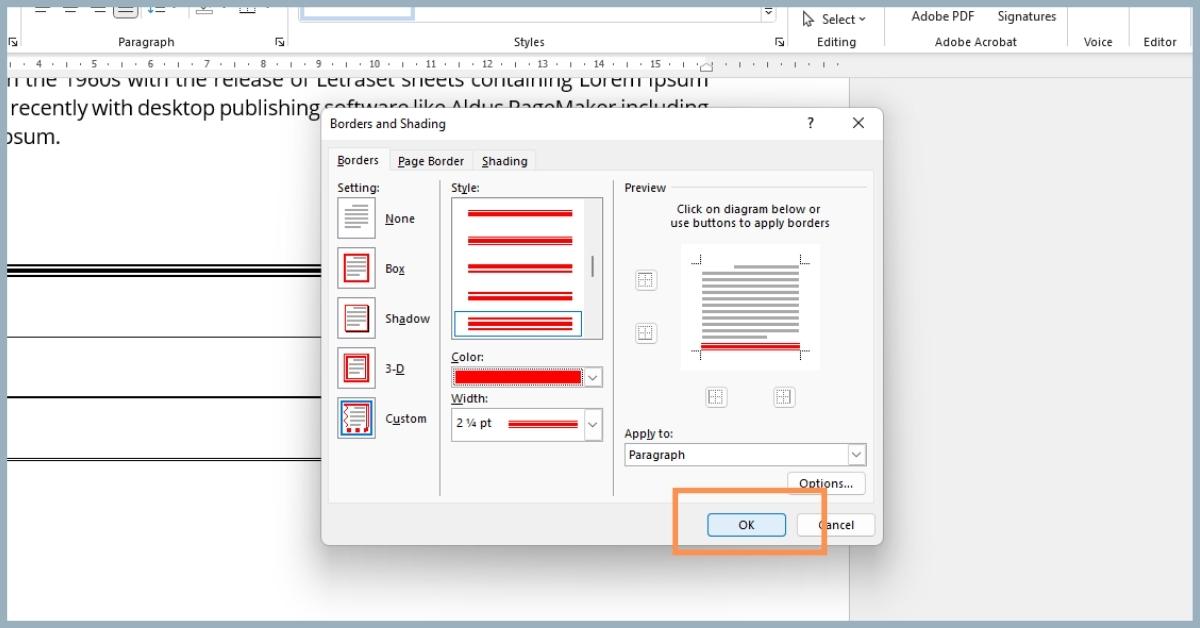
- Then press OK to accept the color change.
If you need more detailed instructions on how to change the color of a horizontal line in Microsoft Word:
- Read below to see my detailed guide with pictures on how to do it, or
- Watch the below video at 32 seconds to see me do it.
Related posts:
How to change the color of a horizontal line in Microsoft Word
Total Time: 1 minute
-
Select the line above the horizontal line

Select
-
Open Borders and Shading

Open the Borders and Shading dialogue box to edit the colour of a horizontal line. To do this do the following:
1. Select the Home tab.
2. In the paragraph section.
3. Select the arrow next to the borders button.
4. Select the Borders and Shading button at the bottom of the dropdown list. -
Select the color

Select the color selection tool and the select which color you want your horizontal line to be.
-
Apply the color change

To apply the color change to your horizontal line, click the line that is shown in the right-hand side graphic. This will change the color that is displayed.
-
Accept the color change

Select OK to accept the color change of your horizontal line.
-
Results

If you followed the steps above correctly then the horizontal line color would have changed to what was selected.
Tools:
- Microsoft Word
Final thoughts
I hope you have found this guide to be useful to you, you can view my other “how to” posts on Microsoft Word here.
